Chakras

Chakras are portals of energy channels that run throughout the human bodies. The term chakras comes from the Hindu word for “wheel” that reflects the dynamic and spherical nature of these energy portals. Chakras are important parts of the subtle body, having powers on the physical, spiritual, and in the transcendent plane of existence. There are 7 chakras in the human body. Each particular chakra has a specific function, resonance, color, phrase, and place in the body. When all chakras are open and in equilibrium, our aura is at its best, and in turn, so is our health and humor.

There are 7 Chakras placed along a vertical line in the body that goes through the head passing the whole body and coming out at the rectum. The spinal cord is the main axis of this energy line of the subtle body.

The seven chakras and their main properties are listed below:

Muladhara or Root Chakra:

  • Placed on the base of the spine around the coccyx region.
  • The color is red.
  • The mantra vibration is Lam (pronounce lum).
  • Earth is its element.
  • This chakra can be stimulated by the phrase: I have/I am here.
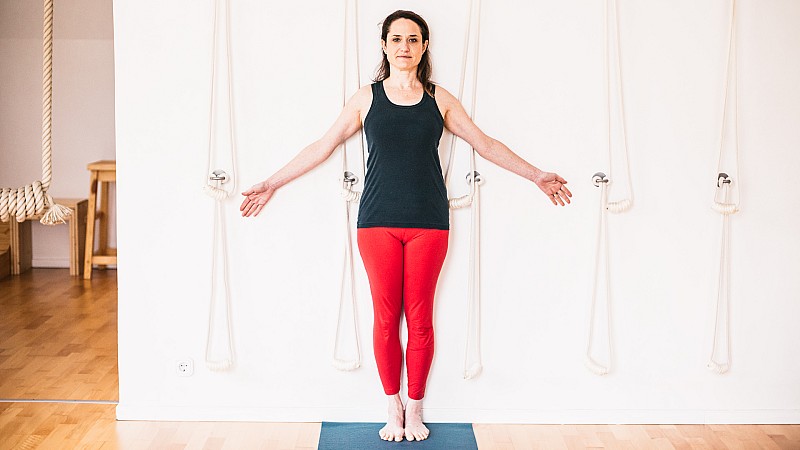
  • Recommended yoga poses, standing postures, and balance.

Svadhishthana or Chakra of the Creation:

  • Placed on the sacrum region along the sexual organs.
  • The color is orange.
  • The mantra is Bam.
  • The element is water.
  • The phrase is I Wish.
  • Recommended yoga poses: hip opener exercises are the best way for empowering the Creation Chakra.

Manipura or Solar Plexus Chakra:

  • This chakra reigns self-discovery.
  • The color is yellow.
  • The element is fire.
  • The phrase is I Can to strengthen this energy portal. When you feel overwhelm think of your solar plexus chakra and repeat I can do it, it will give you strength to overcome the obstacles of the mind.
  • The mantra is Ram.
  • Recommended yoga poses: torsions and abdominal strengthen.

Anahata or Chest Chakra:

  • Placed on the center of the chest.
  • The color is green.
  • The element is air.
  • The phrase is I Love.
  • The mantra is Yam.
  • Recommended yoga poses: Chest opener and arcs are the best postures for Anahata chakra

Vishud or Chakra of the Throat:

  • The color is blue.
  • The element is ether (the space that surrounds us).
  • The mantra is Ham.
  • The phrase is I Speak.
  • The recommended yoga poses are ones that lengthen the neck promote the alignment of the spine.

Chakra of the Sight or Ajna:

  • This energy wheel is located on the forehead, where the third eye is often represented.
  • The color is violet.
  • The element is light.
  • The phrase is I See.
  • The mantra is the powerful Om (pronounce aum).
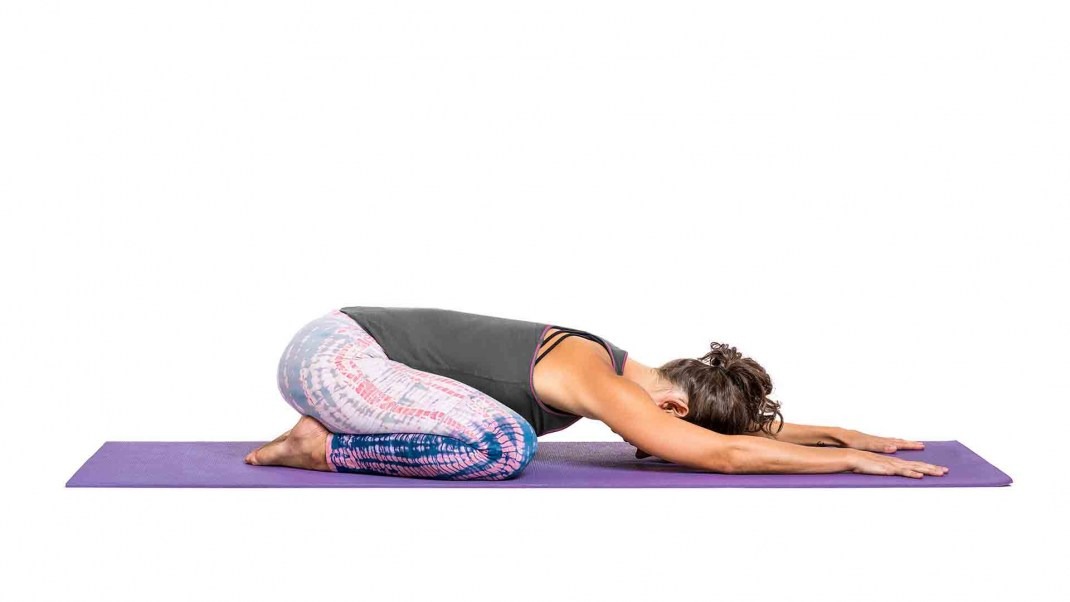
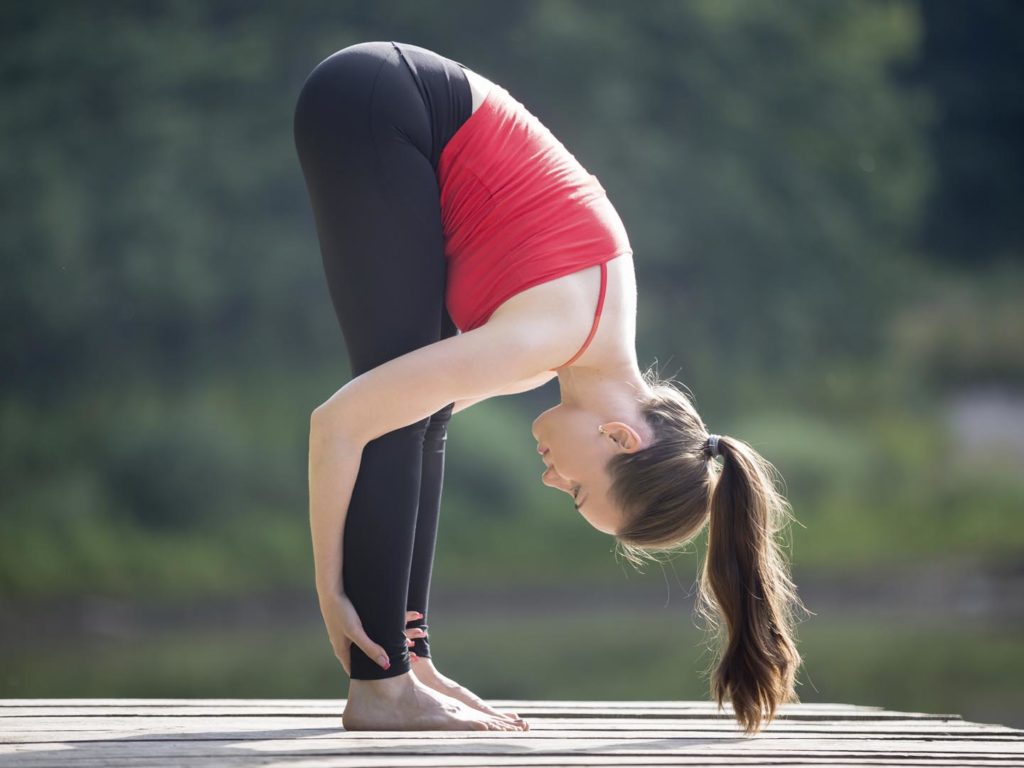
  • Recommended yoga pose are the ones that imply forward flexion or such as.

Sahasrara- Everything is Illuminated:

  • It is located on the crown of the head and together with the root chakra they form the main channels for energy flow to enter and leave the body.
  • The color is bright pink.
  • The element is the cosmic consciousness.
  • The phrase is I am.
  • The mantra is the powerful Om.
  • The best way to stimulate this chakra is by meditation, reciting the Om mantra, and by inversion asanas.

The harmony within brings harmony outside.

Supported Headstand Pose

The supported headstand pose is also known as salamba sirasana. This yogic pose not just helps strengthen your body but also helps blood circulate better. It calms your brain as well.

How to Perform the Pose

Step 1  

Take a blanket or a yoga mat under your head and forearms for support. Kneel down on the ground. Clutch the fingers together. Keep the forearms on the ground and the elbows at the width of your shoulders. While pressing your inner wrist onto the ground, roll the upper arms towards the outside. Set your head’s crown on the ground. In case you’re just starting to practice this pose, press the palm’s base and snuggle your head’s back against your clutched hands.


(Remember to use a blanket or towel for the extra support)

Step 2 

Lift the knees while inhaling. Walk the feet towards your elbows with elevated heels. Lift through your top thighs such that an inverted “V” is formed. Keep your shoulder blades firm against the back and lift the same towards your tailbone such that the front torso stays for long. This will help prevent the collapse of the shoulder weight.

Step 3  

Lift the feet away from the ground while exhaling. Try doing it for both the feet at the same time even if it requires a slight hopping off the ground. As your legs rise 90 degrees to the ground, make your tailbone firm against your pelvis’ back. Turn your upper thigh towards the inside and press your heels towards the roof. The arches of the center must align with the pelvis’ center which must align with the head’s crown.

Step 4  

Keep the outer arms towards the inside with firmness and make your fingers soft. Keep pressing the blades of your shoulder against your back. Balance the weight evenly on the forearms. Make sure that the tailbone constantly lifts upwards. As the back of your leg is completely lengthened, keep the length maintained while pressing up through the big toes such that the inner leg is longer than the other one.

Step 5 

Start practicing for around 10 seconds and increase the time gradually by 5 to 10 seconds. Increase the time for up to 3 minutes. Later, release the pose while exhaling.

Benefits

  • Calms down the brain and releases stress and depression

  • Strengthens the spine, arms, legs, and lungs

  • Enhances digestion and tones the abdominal glands

  • Helps improve menopause symptoms

  • It is a therapy for infertility, asthma, sinusitis, and insomnia

Mistakes and Contradictions

Avoid practicing the pose if you are suffering from a neck injury, high blood pressure, a back injury, menstruation, low blood pressure, and a heart condition.

How to Perform It Perfectly

This yoga pose is considered to be a difficult pose but can be mastered with regular practice. However, you must not practice the pose with no prior experience in the absence of an expert trainer. You can wear comfortable high-waist leggings while practicing the pose such that it can be performed with perfection.

How to Practice Yoga Back Bends Safely

We all love the wow factor of the backbend yoga poses but we don’t all know how to protect our backs when doing them.  Some tips to keep in mind are:

  1. When you are doing backbends you want to make sure you warming up your shoulders really well. 

  2. You also want to warm-up the hip flexor, the muscle at the front top of your thigh. 

  3. Make sure you have some core strength and that you are working your core muscles. 

  4. Keep the outer edges of your feet parallel. A lot of people dangerously turn their feet out during a backbend pose, which externally rotates your thighs causing unwanted compression in the low back. By keeping your feet parallel you can effectively maintain a neutral rotation and avoid lower back compression. 

  5. Avoid a backbend from just your lower back. Your lower back is the bendiest part of your back. That is the part of the back that wants to do the backbend but that is also the part of the back that is the least stable and gets hurt the easiest!

  6. Do use the hip flexors by bringing the thighs and hips forward and then leaning back from there. 

  7. Shoulder: Bring your shoulder blades toward each other and in toward the front of your body. Then roll the shoulder back. 

If you are not sure what that feels like take your block and put it right in the middle of the back and lay down with the block touching this area. That is the part of the back where you close your shoulder blades. 

In your upper back, you have what’s called your “spine”. Sometimes we develop bad posture and yoga backbends help to flatten out the hunches that may develop.

For example in Camel Pose:

Camel Pose:

To practice and watch any thigh rotation here, place a block between your thighs. Holding this block will keep your thighs from rotating outwards. 

Come to your knees, there should be a straight line from your knee to your head. Place the block between your thighs if you choose to. 

Begin shifting your thighs forward in a “limbo game-like” motion. This motion is also similar to wheel pose, your hips move forward and the upper back is bending backward. 

Then roll the shoulders down and back as you continue leaning back. At the same time imagine that there is a string attached to your chest up towards the ceiling. 


Bridge Pose:

In this pose, focus on the same thing alignment-wise. But on your back.

On your back, bend the knees and place feet on the mat making sure they are parallel. 

Raise the hips

Roll the shoulders back and flatten the upper back. 


Wheel Pose: 

Continue following the backbend principles. 

From the bridge pose, swing the arms overhead. 

Place the palms on the mat. Come onto the crown of the head. Line up your wrists right under your elbows. 

Make sure your feet are parallel. 

Watch your elbows here as well; they also want to go out. Make sure they stay parallel. 

Press up through the hands and feet. Reach the tailbone towards the backs of the knee and press your chest towards the wall you are looking at. 


Be safe and enjoy these fun backbends!


How To Start A Private Yoga Business

Teaching yoga is not limited to just studios. Some of these studios can be expensive or only teach certain styles. Once you have a 200hour Yoga Alliance Teacher Training Certification, you can teach yoga anywhere internationally. If you want to start your own private yoga business, here are some important and practical ideas to take into consideration:

Make A Website. Build a professional-looking website on a full hosted network. You can do this by purchasing a domain name. From there, you may want to think about including a blog. A blog is a great way to express ideas, share information about yoga, and keep your clients engaged. Other great ways to do this is through other social media. An account is a great way to keep clients visually engaged. Creating a channel is another great idea as it allows your clients to see the teacher(s) of your yoga business first hand.

Choose Your Market Or Niche. What kind of yoga are you teaching? Is there a certain audience that you want to reach? Some yoga businesses aim their services at experienced yogis, and other yoga businesses aim their services at new clients. 

Consider Your Employees. Is it just you? Would you like to bring other people on board? Do you need liability insurance if someone is hurt in your class? Do you need to register with the yoga alliance or any other local yoga governing body?

What Are Your Services? Are you looking to teach group classes? In what space will these classes be held? Considering outdoor classes is a great way to reduce costs, especially initially. Will you offer private lessons? What rates will services be offered at? Will you hold workshops?

What Is Your Vision? Why is yoga important to you? Consider what yogic values and philosophies you align with most. How can you incorporate these values into your business? Are you hoping to become a yoga school and host yoga teacher training?

Where Will You Offer Services? It is important to consider when you are advertising. Some yoga business offers services internationally. Maybe there are different but specific places you would like to begin to market your business, or perhaps you want to keep it to one city. 

Will You Sell Any Products? Lots of great yoga business have merchandise and activewear to help supplement the business’ income offering great products. Your private yoga business could sell an array of yoga apparel, like yoga pants, yoga leggings, yoga capris, or Lululemon leggings.

These are just some of the considerations you may want to consider when starting your own private yoga business. Many things will come up along the way, and that is okay! The best thing you can do is get started now and figure it out along the way. 

What is Yoga Nidra ?

Once you start to delve into the world of yoga, you might be surprised to find how many different practices and elements there are to explore. Today, we explore “Yoga Nidra” and some of its benefits.

What is Yoga Nidra?

Yoga Nidra is the state of consciousness between waking and sleeping. It is sometimes known as “yogic sleep” and is best described as the feeling you have when your eyes start to close before going to sleep. A moment of complete peace and relaxation, Yoga Nidra can be a powerful meditation technique. 

Why do people practice it?

This is a practice that anyone can complete at any age. It does not involve complicated asana (yoga postures) or any equipment. There also is nothing to fear or get wrong in this meditation. Sometimes, we can associate meditation with sitting uncomfortably and trying frantically to empty our mind whilst simultaneously finding it filling up with thoughts. By contrast, in Yoga Nidra, you lie back in Savasana and allow your mind to freely guide you wherever it might want to go.

How do I practice Yoga Nidra?

Yoga Nidra is always a guided meditation. You could go to a class for this or use one of the many apps or meditations available online. The basic principles involve lying down in Savasana, making sure that you are supported and comfortable. You will set a desire and an intention for your practice just as you might before asana. You will then become aware of your breath and use it to calm your body. A good way to do this is to breathe in for a count of three and then breathe out for a count of five. Keeping your exhale even just a few counts longer than your inhale has a positive effect on your nervous system. It calms your “fight or flight” response, leaving you more able to relax.

One of the key elements of Yoga Nidra is the body scan. This involves gradually moving your awareness through your body from your head to your toes. As you scan down, you will become aware of each part of your body and any sensations that are present. These sensations might be of comfort or pain, but in either case, the key is not to judge them. Instead, you will simply become aware of the feelings in your body and allow yourself to move on.

What are the benefits of this meditation?

Yoga Nidra creates deep restfulness and relaxation within both the body and the mind. This can lead to reduced stress, and therefore, better health. You avoid any potential injury or discomfort that might arise in asana but are still able to access the mental benefits of yoga. This is also a form of meditation that allows you to complete an exploration of your innermost emotions whilst avoiding becoming overwhelmed. On a much simpler level, this is a yoga practice that is easy to integrate into your daily life and may help you to achieve a better night’s sleep if practiced before bed. 

Have you tried Yoga Nidra? Why not try today?

Is an Oversized Sweatshirt the Best Fit for Your Yoga Practice?

When it comes to yoga apparel, one of the most commonly worn tops is the oversized sweatshirt. It’s a great companion for a pair of tight black leggings. This timeless top comes in an endless array of colors, styles, and graphic prints so that each yogi can find something that suits his or her personality. Is this oversized item really the best fit for yogis to wear to their yoga classes?

If you find yourself wondering how this item can be worn to a yoga class, you may want to check out some of these concerns. They can help to evaluate whether this top is right for you.

What Kind of Yoga Do You Practice?

As with any clothing item, the type of yoga you practice should be a top consideration before you make a purchase. A yogi who prefers a hot yoga class obviously doesn’t want to wear a sweatshirt in his/her hot and humid classroom. On the other hand, a yogi who has a very slow and gentle practice may prefer an extra layer for warmth.

This same thought pattern has to be applied to the actual postures that you will use during your yoga practice. If your practice is heavy on inversions, forearm balances, and similar yoga poses, you shouldn’t wear a long-sleeved shirt. The fabric can interfere with your skin’s grip on the yoga mat, creating a safety issue that could cause a serious injury. An oversized item is also extremely likely to fall over your face and make coming out of the posture dangerous as well.


Do You Usually Wear Layers to Class?

Some yogis may prefer to do their regular practice in nothing but a sports bra. This isn’t typically a great idea to wear out and about in the town, so you need to come up with a cover-up. An oversized sweatshirt could be the perfect option to help you dress comfortably without unnecessary and bulky layers.


Are You Ever Cold During Class?

Meditation and finishing postures have a tendency to be very cooling. In an air-conditioned yoga studio, you may find that you’re freezing during these last moments of the class. A light blanket is one solution to help you feel more comfortable and allow you to fully relax into savasana. However, you might want to think about simply wearing your sweatshirt during these chillier times on the yoga mat.

Overall, an oversized sweatshirt is a great companion to a pair of yoga leggings. It just may not be the perfect choice for wearing throughout a yoga practice. You could always bring your sweatshirt to wear before and after class to keep you warm in the chilly spring weather.

Oversized sweatshirts can be a great tool and choice for a yoga outfit, but you have to consider where they’re right for you. Each yogi will be different when it comes to their clothing preferences and needs. Would you be able to wear an oversized sweatshirt to your next yoga class?

Yoga for Scoliosis

Scoliosis is perhaps one of the most common aberrations in the spine. Originated from the word “skol” (Greek), meaning “twist and turns”, this medical condition can be easily observed when the spine creates an S form or reversed S on the back. It causes a displacement of the ribs, the shoulders, and the hips. It also alters the center of gravity in the body.

Types of Scoliosis

There are two types of scoliosis: functional or structural. In functional scoliosis, the muscles in the back are the most affected regions, not the spine itself. This condition can be caused by a poor posture and a consistent unbalanced weight carried by the shoulders. It creates less curvature in the back that is often times unnoticeable and is reversible. On the other hand, structural scoliosis is a serious medical condition resulting from uneven growth on both sides of the bone(s) and most of the cases have unknown causes. This type of scoliosis often times requires surgery.

Finding Balance

Practicing yoga helps the body find its center of gravity. Even though scoliosis causes a shift on a person’s point of balance, the following poses can help reduce pain, avoid increasing the curvature even more and help improve back alignment. Consult your doctor before performing any physical activity.

Pause!

In performing these poses, it is very important to be conscious of your movements. Remember to always keep your weight evenly distributed on both of your feet while walking or standing. Strengthening the legs can help reduce the strain your back muscles and spine carry. Always lengthen your spine to lessen your S curve. Keep in mind to pull your scapula away from your ears to avoid rounding your shoulders. Most importantly, breathe. Be grateful for the time and space you are given to practice.

Mountain Pose

This pose effectively reeducates the muscles in the legs with balance, proper weight distribution and correct posture.

How: Stand with your feet together and allow your arms to relax and dangle on your sides. Close your eyes, and then consciously shift your weight to the balls of your feet. Then, slowly lower your back to the ground, plant your feet, and pull your pelvic floor up to your belly. Stay in this pose for 3-5 breaths.


Cat/Cow Stretch

This movement allows the vertebrae in your back to open up while stretching the tendons and the muscles, which support the spine.

How: Begin in a tabletop position. Inhale as you look up the sky and draw your scapula closer to each other, arching your back. Then, exhale as you round your back, draw your scapula away from each other, and tuck your tail-bone. Keep your gaze on your navel. Repeat this movement five times.


Child’s Pose

This is a very relaxing pose which allows the spine to lengthen and decompress.

How: Start by sitting on your heels. Then, extend both of your arms forward and place them on the ground. Keep reaching forward until your body is resting on your thighs. Keep on actively reaching the arms forward to allow stretch on your back muscles and spine. Stay in this pose for 3-5 breaths.


Remember to always consult your doctor first before starting any physical regimen. If you feel pain during the movements, stop and take a rest. It is recommended to practice under the guidance of an experienced yoga teacher. Be aware of what’s happening inside the body and the thoughts that come to your mind. Breathe through the moment and enjoy the flow.

Realign with Conviction

As you gently move and breathe, the weightless feeling of comfortable and durable yoga leggings can boost your confidence towards progress.

TD Collection Two-Toned Yoga Pants. These yoga pants for women are full-length leggings created with stretchy and soft fabric that also wicks out moisture. Made of 60% nylon, 12% spandex, and 28% polyester, these fashionable leggings are very budget friendly. TD Collection Two-Toned Yoga Pants is very flexible, which allows a wide range of motion and better blood circulation in the leg.

Do not allow your circumstances to define you. Approach them with patience and composure. Have faith that the journey ahead leads to good roads. Practice with awareness and listen to your body. Have faith within yourself and always flow with an open heart!

Diaphragmic Breathing


Our busy, modern life doesn’t allow much time to be still. Texts and emails bombard us. The news around the world worries and angers us. Personal relationships can cause tension and upset. Stress presses in on us and we forget to breathe. This lack of breath then exacerbates our anxiety in a downward spiral that leads to deeper and deeper levels of anxiety and even depression.

There is a way to cope and even conquer these feelings of anxiety. Regaining our breath is the foundation. The ancients of India knew this and practiced it in yoga and meditation. Diaphragmic breathing can reverse the effects of stress and equip you with a valuable tool to quiet your mind and body so that you can face the world and its demands with greater peace and confidence.

In the yoga practice, the breath is the foundation for all practices. By controlling the breath, the yogi is able to achieve a level of deep relaxation and control over impulses and the mind. By retraining yourself to breath from your diaphragm, you can develop a greater ability to deal with stressful situations.

During diaphragmic breathing, the upper chest and lower abdomen do not move. The diaphragm is engaged and flexed, allowing more air to be pulled deep into the lungs. This causes the lower ribs to flair out. By doing this the autonomic nervous system is soothed and relaxed. It is the most important preparation for meditation.

This type of breathing must be learned. Set aside a few minutes every day, throughout the day, to sit quietly to focus on your breathing. You must be someplace where you will not be distracted or disturbed during your practice. Sit either on the floor in the Easy pose or in a straight-backed chair or lying flat on your back on a yoga mat. Either way, be sure your spine is straight, and you are sitting on your behind, so your pelvis is not tilted. If you are lying down, make sure your pelvis is not tilted and your spine is straight and not overly curved as this will cause tension.

Now place one hand on your upper chest and the other on your abdomen. As you flex your diaphragm feel the air come into your lungs, through your nose, evenly and deeply but do not exaggerate the inhalation. Let the breath be continuous with no pauses, so don’t hold your breath. Be sure only the lower ribs are flaring outwards as you inhale, and the abdomen and upper chest remain still. Breathe slowly, being sure you are comfortable and not straining. Let the inhalation be the same length as the exhalation. Once you are breathing comfortably, begin a count so that your exhalation is twice the length of your inhalation. So, you might count slowly to 4 on the inhale and then to 8 as you exhale completely.

As you breathe with your diaphragm, become aware of your breath at your nostrils. Do this for several minutes, focusing on your breath and the sensation of the air moving through your nostrils. As you do this, becoming more focused, you may choose to continue into meditation. This practice of diaphragmic breathing is essential to mediation practice.

By practicing diaphragmic breathing, you gain the benefit of stress reduction and control over your breath which is often restricted during stressful situations. This practice can help those who suffer from panic attacks and from asthma to increase lung capacity and sooth the brain and nervous system. When stress responses are then activated, by taking the time to engage the diaphragm and practice this breathing exercise, you can gain better control over your emotions and body, gaining confidence and calmness. Happy breathing!


The Significance of Your Inhalation and Exhalation


Because our breath is such a normal and automatic thing, we tend to push it off like it doesn’t mean anything. In yoga there are multiple uses and meanings to our breath in general but today we’re going to focus on what our “Inhale” and “Exhale” are actually used for in yoga.

Have you ever wondered why your yoga instructor tells you to do specific movements on inhales and others on exhales? It’s because there is a sort of dance you do with your breath in yoga. Each section of your breath is tied directly to a number of purposes and uses. Let’s start off with your inhale.

What Your Inhale Means in Yoga

The purpose of your inhale in yoga is to consume. Your inhale is a time where you can take up space that you just can’t take up during an exhale. You can ingest anything like energy, emotions, space, etc. It is an invigorating part of the breath and that’s what makes it a great time to set intentions and find confidence in your yoga practice.
When you are inhaling you should generally be moving either upwards or forwards. If you are familiar with sun salutations you can even try thinking about it for a second and pay attention to all of the upward and forwards movements. The sun salutation and any yoga flow should abide by these rules. Anytime a flow has an exception to the rule you can probably notice it because it feels awkward or wrong in some way.

What Your Exhale Means in Yoga

The purpose of your exhale is to release. This can be expressed in multiple ways. It can be expressed by releasing energy, emotions, and space or it can be expressed by transferring your energy into something new while you rest. Your exhale should not be a collapse but just a release of what no longer serves you. There is still strength and incredible purpose to your exhale but it is more passive or transformational than your inhale.
The movements associated with your exhale are naturally the opposite of the inhale. Anytime you move down or backwards your exhale should be right there with you. Again, I encourage you to consider the sun salutation and run through it in your mind as you fall and move back every time you exhale. Another way that this section of your breath is used is by moving deeper into poses.


How Your Inhale and Exhale Work Together

Now you know how both your inhaling and exhaling work on their own but they do some amazing things together as well. They build on one another in a very practical and beautiful way. When you become aware of the uses of your breath in yoga, it becomes a sort of dance. Yoga is like a dance and your breath becomes the music that you dance to. It suddenly feels as if the sequences were made up for you by your own natural and internal rhythm. Your body rises with your inhale and lowers with the exhale. The next time around you move forward with your inhale and then go back with the exhale. After some practice with being mindful of your breath in relation to your movement, you can almost begin to anticipate the next movement before the instructor even calls it out.

Your breath can really take your yoga practice to a whole new level. It can help you with your alignment, energy, and as you read today, a whole lot more!

Mindful Eating: The Anti-Diet That Can Help You Lose Weight for Good

If it’s a fresh, hot off the press weight loss plan, we’re trying it. Diet after diet, many of us crack and end up back where we started, diving head first into a cheesecake. What if there was a way you could reach your weight loss goals without having to follow another crazy strict diet? If you think this sounds too good to be true, you’re wrong.

The truth is fad diets work until they don’t work. Think about the last time you started a new diet plan. You were excited and ready to tackle it full force and it seemed like something you could stick to for a long time. Fast forward three weeks into the diet, when your willpower starts to dwindle and food cravings begin rearing their ugly heads. You can only exercise your willpower muscle so much until it cracks, leading you into an all-out cheat fest on those foods you banned from your diet.

This is where a useful tactic called mindfulness can come in handy. You might have experienced the word ‘mindfulness’ being mentioned in the yoga community. Being mindful while eating is similar to utilizing mindfulness during your yoga or meditation practice. It is a simple and practical method that can help you stay in the moment when you sit down to have a meal, which will have a substantial impact on your weight loss efforts. We live in a fast-paced environment, where it’s not uncommon to multitask throughout the day in order to check things off our to-do lists. By practicing mindfulness during each of your meals, you will be able to listen to your body and react accordingly to the signals it’s sending you. Follow these tips before you sit down for your next meal and you will be on your way to a healthier relationship with food and your body.

Try not to label any food “off limits.” This only makes you want said food more, increasing the likelihood that you will binge. If you’re craving a particular food, allow yourself to have it. Before you take the first bite, ask yourself if you’re truly hungry or if you’re bored, stressed, sad or angry. If you are experiencing true hunger, allow yourself to have that food and enjoy every bite.

Before you take the first bite, sit in a quiet place, free from any distractions such as television, computers or phones. That means no social media! If you can, leave all electronics off the table and focus on what’s going on around you. Chew each bite of food slowly and actually taste your food. How does it taste? Is it too hot or cold? Spicy or bland? Don’t be so quick to douse your meal with salt before even trying it!

Take a few sips of water between bites to help you digest. Every so often, check in with your body. When you’re about a 6 on the fullness scale, put down the fork or spoon and stop eating. You want to be satisfied, not overly stuffed.

Practicing mindfulness around eating will not only help you lose weight, but it will help you appreciate food. Food is not a scary monster under the bed. Just like we learned how turn off our bodies natural hunger cues, we can re-learn how to react to them again.